|
|
||
|---|---|---|
| .github/workflows | ||
| Assets | ||
| Packages | ||
| ProjectSettings | ||
| Telemetry | ||
| docs | ||
| .clang-format | ||
| .gitattributes | ||
| .gitignore | ||
| .pre-commit-config.yaml | ||
| LICENSE | ||
| README.md | ||
| RELEASE.md | ||
README.md
micromissiles-unity
Quick Start
We generate pre-built standalone binaries for Windows and Mac users from the release branch. These binaries are intended for non-development users who just want to run the application and modify a few configurations along the way.
You can find the latest release here.
Windows
- Download the zip file for Windows:
micromissiles-<version>-windows_x86_64.zip. - Unzip the zip file. The zip file should contain a single directory called
micromissiles-<version>-windows_x86_64. - In the
micromissiles-<version>-windows_x86_64directory, runmicromissiles-<version>-StandaloneWindows64.exe.
Mac
- Download the tarball file for Darwin:
micromissiles-<version>-darwin.tar.gz. - Untar the tarball. The tarball should contain a single directory called
micromissiles-<version>-darwin. - In the
micromissiles-<version>-darwindirectory, run the app file. - If you get a warning that Apple cannot check the application for malicious software:
- Open
System Preferences. - Navigate to
Privacy & Security. - Click on
Open Anywayto bypass Apple's developer check.
- Open
Development
This guide will help you set up and run the project in development mode. You'll learn how to install Unity Hub, open the project, and navigate the main scene.
Table of Contents
Prerequisites
- A computer with internet access.
- Administrative privileges to install software.
- Git installed on your system (optional, for cloning the repository).
Installation Steps
1. Install Unity Hub
Unity Hub is a desktop application that manages your Unity projects and installations. It simplifies the process of installing different Unity versions and launching projects.
Steps to Install Unity Hub:
- Visit the Unity Download Page.
- Click on "Download Unity Hub".
- Run the downloaded installer and follow the on-screen instructions to complete the installation.
2. Clone the Project Repository
Obtain the project source code by cloning the repository from GitHub.
git clone https://github.com/PisterLab/micromissiles-unity.git
Alternatively, you can download the repository as a ZIP file and extract it to a preferred location.
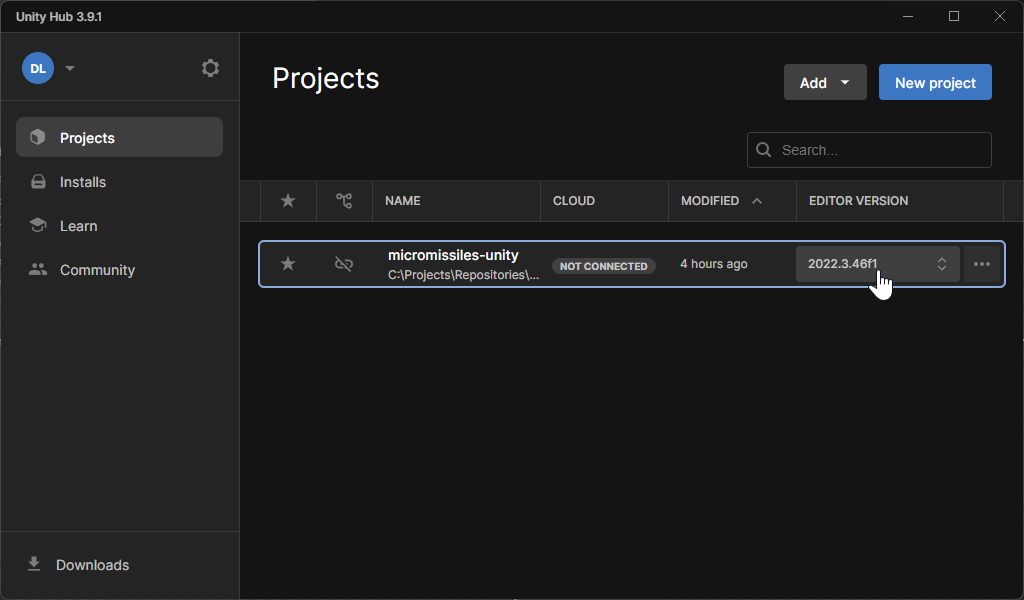
3. Launch the Project via Unity Hub
-
Open Unity Hub.
-
Add the Project to Unity Hub:
- Navigate to the "Projects" tab.
- Click on the "ADD" button.
- Browse to the folder where you cloned or extracted the project.
- Select the folder containing the
Assetsfolder and click on "Select Folder".
-
Install the Required Unity Version:
- Unity Hub will detect if the project requires a Unity version that is not currently installed.
- A notification or warning icon may appear next to the project name.
- Click on the notification and select "Install Unity [version]".
- Unity Hub will download and install the required Unity version automatically.
-
Open the Project:
- Once the required Unity version is installed, click on the project name in Unity Hub to open it.
4. Open the Main Scene
After the project opens in Unity:
-
In the Project window (usually located at the bottom), navigate to:
Assets/Scenes/ -
Find the main scene file, usually named
MainScene.unity. -
Double-click on
MainScene.unityto open it. -
The scene will load in the Scene view. You can now run the simulation by clicking the Play button at the top of the Unity Editor.
Next Steps
- Familiarize yourself with the Keybinds and Controls to navigate and interact with the simulation.
- Learn how to configure the simulation settings by reading the Simulation Configuration Guide.

